

Wait 24 hours after shaving before applying self-tanner. That single rule prevents the most common complaints: dark dots at follicles, uneven patches, and razor-burn flare-ups that make DHA (the active tanning chemistry) react with the wrong skin proteins. The good news is that same-day tanning is not impossible. If you genuinely cannot wait, a lightweight gradual tanning water, such as the after5 gradual tanning water, is your lowest-risk option.
Here is what the 24-hour rule actually protects you from:
- Dotting and strawberry legs: freshly shaved follicles are open, and DHA settles into them, creating visible dark spots.
- Razor burn and irritation: applying tanner to inflamed skin intensifies redness and can cause stinging.
- Patchy absorption: micro-tears from shaving create an uneven surface where colour develops inconsistently.
- Same-day exception: a thin layer of oil-free gradual tanning water applied carefully can work in a pinch, with realistic expectations.
Pro Tip: Celebrity tanner Isabel Alysa advises shaving the day before your tan and waiting 24 hours, not the morning of. The skin needs time to settle, not just to cool down.
Table of Contents
- Why shaving before self-tanner needs a buffer
- How long should you wait? A guide by hair-removal method
- How to shave so your tan goes on evenly
- Your skin prep checklist for the 48 hours before tanning
- What to do if you need to self-tan the same day
- How to fix dotting, streaks, or irritation after tanning too soon
- The simplest schedule to follow next time
- Key takeaways
- The honest truth about timing and self-tan
- The after5 gradual tanning water is made for moments like this
- Useful sources
Why shaving before self-tanner needs a buffer
Shaving does more than remove hair. It lightly exfoliates the skin surface, lifts dead cells, and leaves follicles temporarily open. When you apply self-tanner straight after, DHA reacts with whatever proteins are exposed, including the raw edges of micro-nicks and the inside of open pores. The result is darker dots and uneven colour that no amount of blending fixes.
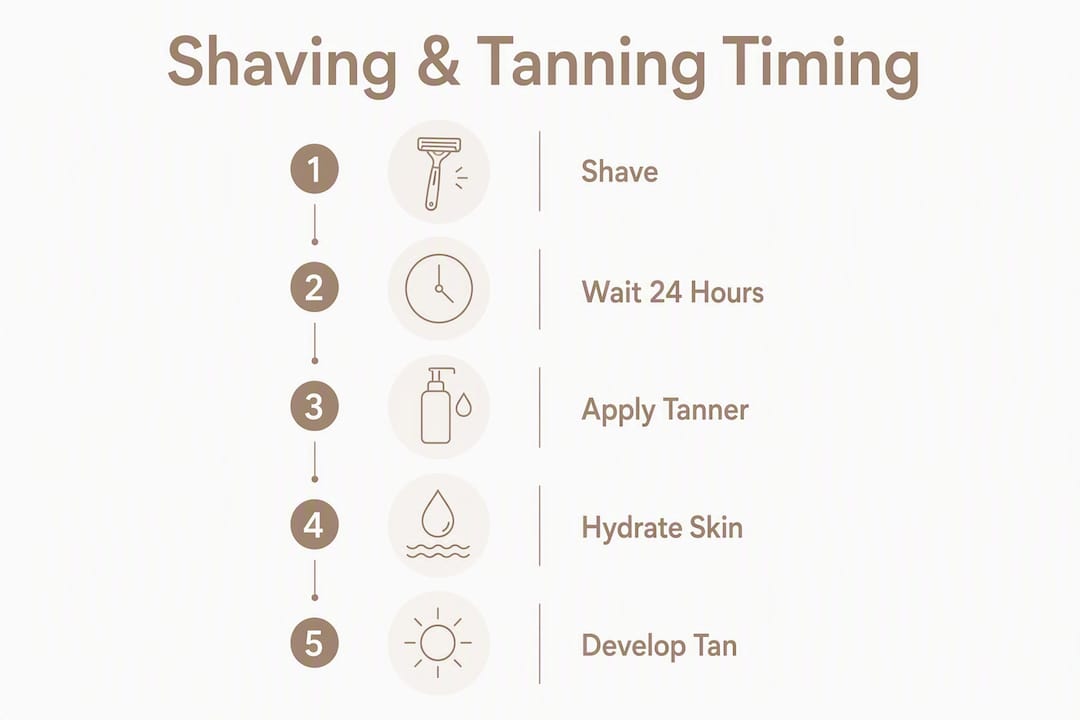
Professional tanners and editors consistently recommend a 24–48 hour prep window: shave or wax 24 hours before tanning, never the same day. Hydration matters too. Well-moisturised skin holds colour longer and fades more evenly, while heavy oils applied immediately before tanning can block DHA absorption and cause patchiness.
How long should you wait? A guide by hair-removal method
The right buffer depends on how you remove hair, because each method leaves the skin in a different state.
- Shaving: wait 24 hours. Shaving is the mildest method, but it still opens follicles and causes micro-nicks. Aim for 24 hours to allow the skin barrier to recover and for follicles to close.
- Waxing or epilation: wait 24–48 hours. These methods pull hair from the root, leaving follicles raw and skin more reactive. A 24–48 hour buffer gives the skin barrier time to recover properly.
- Depilatory creams: wait at least 24 hours. The chemicals in hair-removal creams can sensitise skin, making it more prone to irritation when tanner is applied.
- Laser hair removal: follow your clinic’s advice, which is typically several days to a week, as treated skin is particularly sensitive.
- No hair removal: you can tan with stubble or unshaved legs without any dotting risk. Unshaved skin actually holds tan well, though the result may look slightly less smooth.
- Same day (not recommended): if you must, choose a gradual or light formula and apply a very thin layer. Expect a milder result and some risk of dotting.
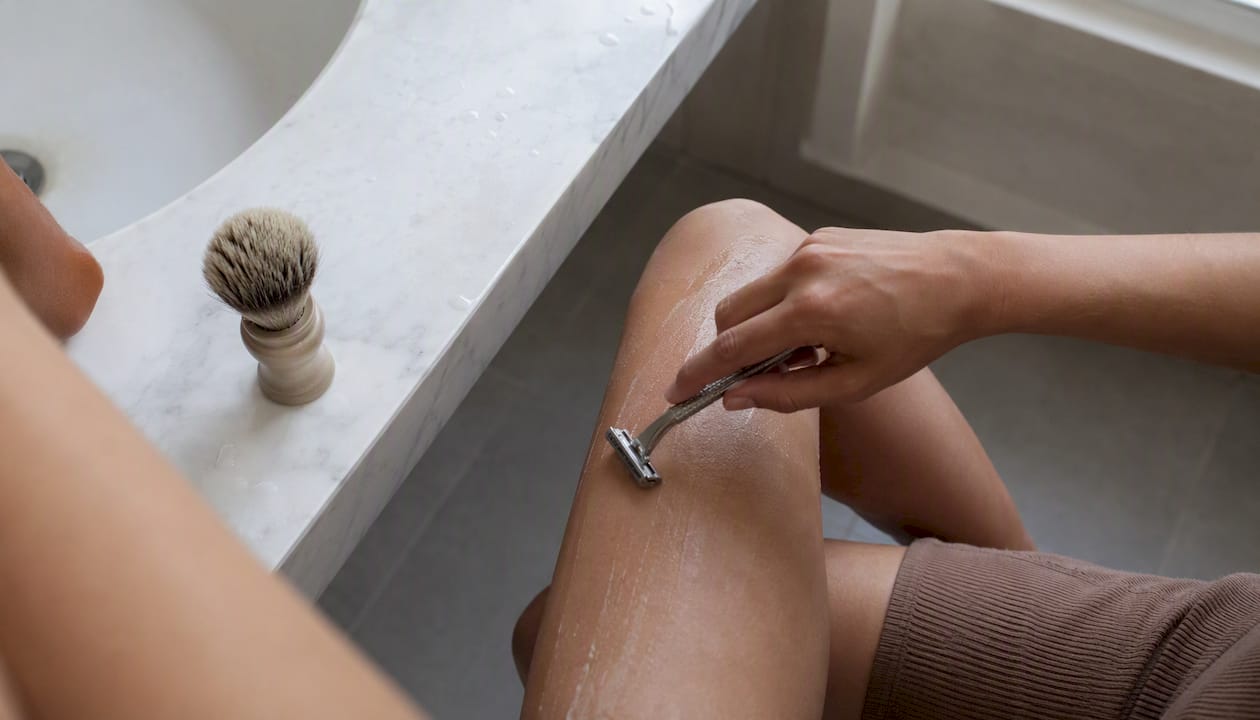
How to shave so your tan goes on evenly
The technique matters as much as the timing. A good shave leaves a smooth, calm surface; a rushed one creates the micro-tears that cause patchiness.
- Exfoliate first. Use a gentle body scrub or exfoliating mitt before you shave, not after. This removes dead skin cells and gives the razor a cleaner surface to work on.
- Soften hair with warm water. Spend two to three minutes in a warm shower before shaving. Softened hair cuts more cleanly and reduces drag on the skin.
- Use a sharp razor. A dull razor causes micro-tears that create an uneven surface where self-tanner clings unevenly. Replace blades regularly.
- Apply a moisturising shave cream or oil. Choose one that rinses clean. Residue-forming oils can block DHA absorption later, so rinse thoroughly.
- Shave with the grain. Single-direction passes reduce irritation. Going against the grain gives a closer shave but increases the chance of ingrown hairs and micro-nicks.
- Rinse with cool water. Cool water helps close follicles after shaving, which is exactly what you want before tanning.
- Pat dry gently. Rubbing with a towel adds friction to already-sensitised skin.
- Moisturise lightly. Apply a lightweight, fast-absorbing moisturiser. Avoid heavy creams or anything with retinol or AHAs immediately before tanning, as these accelerate cell turnover and can cause uneven fading.
- Wait 24 hours. Then apply your self-tanner on clean, dry skin.
Pro Tip: One clean pass with a sharp razor beats two passes with a dull one every time. Fewer strokes mean less friction and a calmer surface for your tan.
Your skin prep checklist for the 48 hours before tanning
Getting the timing right across two days makes a real difference to how evenly your tan develops and how long it lasts.
48 hours before:
- Complete waxing or epilation if that is your method, giving skin the full recovery window.
- Avoid heavy body oils or thick creams that could clog follicles.
24 hours before:
- Exfoliate in the shower with a gentle scrub or mitt. Spend extra time on elbows, knees, and ankles.
- Shave after exfoliating, then rinse well with cool water.
- Moisturise normally, but go lighter on very dry areas so you do not leave a thick film that blocks tanner later.
On tan day:
- Take a cool or warm shower (not hot, as heat keeps skin clammy and can affect application).
- Pat skin completely dry.
- Apply a small amount of lightweight moisturiser to trouble spots only: knees, ankles, elbows, hands, and feet. A targeted moisturiser on dry spots dilutes the tanner there and prevents concentrated staining.
- Wait 10–20 minutes for the moisturiser to absorb fully before applying tanner.
- Skip heavy deodorants and avoid any product with oils on the areas you plan to tan.
What to do if you need to self-tan the same day
Sometimes the timing just does not work out. Here is how to reduce the risk when you cannot wait.
- Choose a gradual tanning water or light tinted lotion. Oil-free, water-based formulas are less likely to settle into open follicles. They build colour gradually, so any minor dotting is far less visible.
- Apply in a very thin layer. Less product means less DHA pooling in follicles. You can always add a second layer the following day.
- Do a patch test first. Apply a small amount to the inside of your wrist or ankle and wait 20 minutes to check for irritation before doing your full body.
- Dilute on follicle-prone areas. On legs and underarms, blend the product out with slightly damp hands to thin the layer over freshly shaved skin.
- Avoid heavy oils and greasy creams. These block DHA absorption and can cause the tanner to slide rather than develop evenly.
- Manage expectations. Same-day results will likely be milder and slightly less even. That is not a failure; it is the product working within its limits.
How to fix dotting, streaks, or irritation after tanning too soon
Mistakes happen. Here is how to correct them without making things worse.
- Soothe irritation first. If your skin is red or stinging, apply a cool compress and a lightweight, fragrance-free hydrating lotion. Do not exfoliate until the irritation has fully settled.
- Fade dark dots gently. Apply a body oil or coconut oil to the affected area and leave it for 10–15 minutes. Then use a gentle exfoliating mitt in light circular motions. Repeat over 48–72 hours rather than scrubbing hard in one session.
- Use a tan remover for stubborn patches. If oil and gentle exfoliation are not enough, a dedicated tan remover product can help. Apply it to the problem area only, following the product instructions.
- Spot-treat stained hands or wrists. A paste of bicarbonate of soda and water, applied for a few minutes and rinsed off, can lighten staining on hands. Oil-based removers also work well on small spots.
- Avoid over-scrubbing. Vigorous scrubbing on irritated or recently shaved skin can cause further damage and make the area more reactive to any future tanner application.
If you experience a severe reaction, persistent redness, or broken skin, stop all tanning products and consult a pharmacist or GP before reapplying anything.
The simplest schedule to follow next time
Stick to this and you will get a noticeably more even, longer-lasting result.
- Day minus 1 (evening): exfoliate in the shower, shave, rinse with cool water, moisturise lightly, and wait 24 hours.
- Day 0 (tan day): cool shower, pat dry, spot-moisturise trouble areas, wait 10–20 minutes, apply tanner.
- If deviating from this plan: do a patch test first, choose a gradual or light formula, and apply a thinner layer than you think you need.
The 24-hour prep window is not about being overly cautious. It is simply the difference between a tan that looks natural and one that needs fixing.
Key takeaways
Shaving 24 hours before applying self-tanner gives your skin barrier time to recover, so DHA reacts evenly and you avoid the dotting, patchiness, and irritation that come from tanning too soon.
| Point | Details |
|---|---|
| The 24-hour rule | Shave the day before tanning to let follicles close and skin calm for an even result. |
| Why it matters | Open follicles and micro-tears cause DHA to pool, creating dark dots and patchy colour. |
| Same-day option | A thin layer of oil-free gradual tanning water is the lowest-risk choice when you cannot wait. |
| Shave technique | Use a sharp razor, shave with the grain, and rinse with cool water to minimise micro-tears. |
| Helloafter5 recommendation | The after5 gradual tanning water is oil-free and lightweight, making it the gentlest same-day option for freshly shaved skin. |
The honest truth about timing and self-tan
The 24-hour rule gets dismissed more often than it should. People assume it is just cautious advice for sensitive skin, but the dotting issue affects almost everyone who shaves and tans the same day, regardless of skin type. The follicle is physically open; DHA has nowhere to go but in.

What I find more interesting is the flip side: unshaved skin actually tans beautifully. Stubble does not cause dotting, and legs that have not been shaved in a few days often hold colour more evenly than freshly shaved ones. The problem is not hair removal itself; it is the timing.
The other thing worth saying is that gradual formulas have changed the same-day conversation. A water-based, oil-free tanning water applied in a thin layer is genuinely forgiving on freshly shaved skin in a way that a heavy mousse simply is not. The colour builds slowly, which means any minor unevenness is far less visible. It is not a perfect workaround, but it is a practical one.
The skincare-first approach to self-tanning, hydrating ingredients, lightweight textures, no greasy residue, is not just about comfort. It is about giving DHA the cleanest possible surface to work on. That is where a good result actually starts.
The after5 gradual tanning water is made for moments like this
When you need a natural-looking glow without the wait, the after5 gradual tanning water from Helloafter5 is the gentlest way to get there. It is oil-free, lightweight, and formulated with hyaluronic acid and aloe vera, so it hydrates as it develops rather than sitting heavily on freshly shaved skin. Because it builds colour gradually, any minor unevenness from a same-day application is far less noticeable than with a full-strength mousse.

Apply a thin layer, dilute over follicle-prone areas, and let it develop fully before moisturising. If you are new to it, the 15ml travel size is a low-commitment way to try it first. For a longer-term routine, the 50ml or 100ml sizes give you enough product to build and maintain your colour week by week. Vegan, cruelty-free, and suitable for acne-prone skin.
Useful sources
- The best self-tan routine according to pros and editors — MindBodyGreen: practical expert consensus on prep windows and hydration, useful for timing guidance.
- How to self-tan at home and get professional-looking results — Allure: covers application technique, aftercare, and how to correct mistakes.
- Kim Kardashian’s spray-tan expert shares her tips for faking a natural glow — Vogue: celebrity tanner perspective on the 24-hour rule and same-day risks.
- How to prep your skin for self tanner — eos: practical shaving sequence, razor advice, and exfoliation timing.
- How to prep your skin for self-tanning: avoid patchy results — BlushPicks: two-day prep approach and wait-time guidance by hair-removal method.
- How to apply self-tanner — American Academy of Dermatology: authoritative guidance on application steps, dilution on joints, and aftercare.
Recommended
- How to Get a Natural-Looking Tan That Actually Matches Your Skin Tone – after5: Sunless Tanning Water + Self-Care Products
- Tanning Water| Oil Free Body Shimmer| Gradual Tanning| after5 – after5: Sunless Tanning Water + Self-Care Products
- Gradual Tanning Water: Why It’s the Ultimate Glow Hack for Your Skin – after5: Sunless Tanning Water + Self-Care Products
- Oil-Free Body Shimmer: Why It’s the Secret to a Radiant Body Glow and – after5: Sunless Tanning Water + Self-Care Products